Sunday, January 31, 2010

Upside Down Night!

Sawyer has officially named this game, "Upside Down." The object of the game is for Jason to throw the boys over his shoulder so they are upside down and then spin them around or whatever he feels like doing. Then he puts them on the floor, they walk around like drunkin' sailors and the next one steps up for his turn. I love this photo. There are times when Ruger laughs really hard or has a big grin and he looks just like his older cousin Kate did when she was his age...Too cute!

Thursday, January 28, 2010

Today...

  • I did not say a single bad word (like I ever do that anyway).
  • I made chicken noodle soup in the crock pot!
  • I mopped half of my living room floor (then the kids came in).
  • Ruger had his first play date in a long time...that was fun!
  • Sawyer did not take a nap and has yet to be grumpy.
  • Jason stayed home and was grumpy.
  • I went to start my dishes three times and got distracted each time.
  • I found 5 bouncy balls under the couch (hmmm...)
  • I managed to break both our new tv and dvd player...oops!
  • We ditched our satellite and went for netflix (totally worth it).
  • Jason finalized his submissions to get his Master's degree...yipee!

And now I'm off to get my hair done. I will post pics of the kiddos again...once I capture a photo of them clothed!

Tuesday, January 26, 2010

It's Official!

So, two weeks ago I bought my airline tickets for a steal on Priceline.com and then the very next day I turned in my application to International Quilt Market in May! Lucky for me I just got my acceptance letter...I'm soooooo excited! And on this wonderful day these are the thoughts that have run through my mind:

1. My brother Brett said, "It's hard, but don't stop, keep sewing, something great will come."
2. I can't believe it took me nearly 15 visits to Amy's shop before I purchased some fabric.
3. I'm sooooooo EXCITED to go!
4. I'm so grateful that I decided to do patterns, even though I didn't want to because I was
afraid. The support in this town and in all of my stores here in Idaho and Utah has been
amazing!
5. I can't believe I'm really going!

OK, that's all! I just wanted to share the good news and I'm sure there will be more between now and then, as I have many fun things planned! This little blog has been my greatest support system of all, I may not have a million readers, but I certainly have the BEST readers! Thank YOU!

Saturday, January 23, 2010

Chicken Fried Steak Recipe

OK, so when Roni was visiting I hounded her for recipes. I made her plan out a two week menu with recipes that I had not tried before, BECAUSE I was in such a slump with recipes and my poor husband was getting hungry. My favorite thus far has been Roni's Chicken Fried Steak...I have had this before at her house, but have never made it myself (one of the great downfalls of your best friend moving far away...you have to learn all of her recipes and make them for yourself). So I asked her for permission and she hasn't agreed yet, but I'm sure she won't care. So here it goes:

CHICKEN FRIED STEAK:
-4 steaks
-Ritz Crackers (Saltines work too)
-2 tsp. garlic salt
-1/4 cup flour
-2 eggs

In one bowl crush crackers and mix in garlic salt (I used a roll of crackers).
Put your flour in a second bowl.
And in a third bowl beat your eggs.
In a skillet, heat some oil, about 1/2" deep.
Dip your steaks in the flour first, then coat them in eggs, and then coat them in the crushed crackers.
Place them in the hot oil until they are cooked all the way through.

There are two ways to eat this. The Poston's eat it with potatoes. We dip ours in applesauce.....soooooo good....even your kiddos will eat it. I have the pickiest eater ever and he devoured it! :)

Thursday, January 21, 2010

Giving It ALL AwaY!

One of my favorite things about working in the pattern design industry, are the friends that I've made. Amy has become one of my very nearest and dearest friends over the past two years and she has been one of the great supporters that has brought me this far. For those of you who live in my area, you'll remember the massive power outage we had a month ago. That was the very same day that Amy's new fabric line, Marabella, arrived at her home. She came over to my home that night to share the goodness with Roni and I. It was so exciting to lay all the fabrics out and actually touch and smell them (yes, that sounds absurd, but it was amazing...and delicious)! She was so kind to share a little bit of yardage with me and together her Marabella fabrics and my Simply Legendary pattern made this...
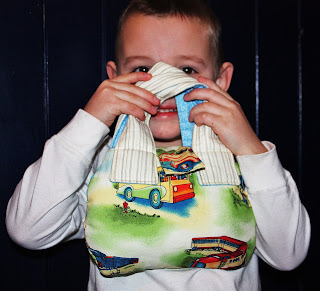
Isn't it pretty? If you think so, then you will just be thrilled to hear this! AMY is giving away some of this amazing fabric over at her blog and she has another give away listed there as well! So head on over and enter to win...and tell her I sent you just so she can feel my love! Not that she doesn't already!
And just for fun...I'm going to offer my Simply Legendary Pattern for only $6. You can pick one up in my Etsy shop...offer ends soon!

Wednesday, January 13, 2010

Did you know? I didn't!

A couple of months ago I was called to be Primary President in our ward. While I was unsure of the calling, I was psyched to be in with Ruger and watch him participate. You can imagine my disappointment after the first three weeks of watching him cover his ears during singing time, climb over chairs and run back and forth between myself and his teacher...like he was bored. That's really funny saying that now, because he WAS bored....he was going crazy sitting there.
I have known something was going on for a couple of years, but we couldn't pin point it. Hence, the removal of his tonsils last year. Primary was the answer for both of us though, as well as my breaking point. I was talking with my friend Michelle and she mentioned his hearing. I said that we had thought about that, but because he covered his ears we didn't think he was struggling...and also the fact that he speaks OK...not perfect, but his doctor said some kids just don't pick up as quickly as others.
So without his pediatrician's consent (insurance and doctors have done us NO good this year...I quit!) we went to a Hearing Specialist and within 5 minutes she was able to tell us that he has a significant hearing loss in both ears and the fact that he speaks as well as he does was simply MIRACULOUS! (Yes, she said it just like that with italics and caps!)
It's been a few weeks with these little contraptions and his speech has come along way...and the best part is, We say we're having ham for dinner and he doesn't think we're eating our dog, Sam for dinner. Isn't he just adorable? He got to pick out his colors, so of course, we got blue and black swirls!


Disclaimer: We love our Pediatrician and would never consider going elsewhere. It's not unsual for people to think I'm completely paranoid and out of my mind, so we'll give him credit for atleast listening! :)

Sunday, January 3, 2010

Life's a changin'.

There's a lot that I am certain of and even more that I am uncertain of, but one thing's for sure, I do love my boys!

Happy New Year!

Friday, January 1, 2010

Leapster Carry Case Tutorial.

I've been asked about this little bag by a few people and as promised I'm posting the sewww simple instructions. I am a frugal little gal, as most of you know and I hate paying for things. We were able to purchase the boys gifts at around half of their normal price, but the accessories for the Leapster 2 were another story. So instead of purchasing the adorable little case, I made my own. It's sturdy, protective and my little guy loves it!
I used all scraps to make this...that's how little you need.

To Start you need:
-5 pieces of fabric 7" by 10" for body, lining, and pocket.
-4 strips of fabric 3" by 15" for handles.
-2 pieces of fabric 4" by 2.5" for tab.
-1 swatch of velcro.
-Fusible fleece.

1. Make a cute little curve around each side edge of your body, lining, and pocket pieces. You can use the Leapster shape as your guide if needed.
2. Apply fusible fleece wrong side of your body pieces, lining pieces, 2 handle pieces, one tab piece, and half of your pocket piece.
3. Fold pocket piece in half as shown and sew it to one of the lining pieces (down sides and across bottom) as shown.
4. With lining pieces right sides together, sew down both sides and across the bottom, leaving a 3" opening in the bottom to turn later.
5. With right sides together, take one lining handle piece and one body handle piece and sew around all four edges leaving a 2" opening to turn. Turn right sides out, press and top stitch around all four edges. Repeat with other handle pieces. They should look like this when finished:
6. Apply velcro to the tab's lining piece. With right sides together, sew down both edges and across bottom of tab. Turn right sides out and top stitch. Center tab on the back side of body piece, with tab facing down and stitch in place. 7. On the right sides of each body piece, sew handles in place, as shown. Center other half of velcro in between the handle on the opposite side of tab. With body pieces right sides together, sew down both sides and across the bottom.
8. Pin handles and tab facing down. Place body inside of lining with right sides together and pin around top edge, as shown:
9. Sew all the way around the top edge.
10. Pull the entire bag through the opening you left in the bottom of the bag.
11. Top stitch opening closed and then top stitch all the way around the top edge of the bag.

This little case fits the leapster 2, several games, and the computer cord. It's snug too, so things don't fall out.