- 15 inches of the softest minkie you can find.
- 8 inches of fun patterned fabric.
- batting
- velcro
Tabs:
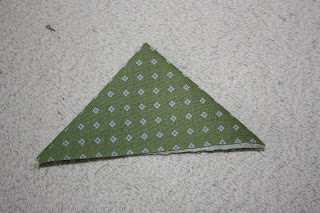
Begin by cutting your 8" of fabric in two 4" strips. Set aside one strip. Take the other strip and cut 12, 4" by 4" squares, as shown. Fold each square in half diagonally (corner to corner) and then fold again into the shape of a triangle, as shown.
 Handle:
Take your other 4" strip and fold in half length wise, right sides together. Sew around the edges, leaving a small opening. Untuck, with right sides out, press, and stitch around all four edges. You can also line your handle with batting for extra security if so desired.
 Next, you will take your soft fabric and cut out two, 15" by 15" squares and one 15" by 11" rectangle with a salvage edge. Using the rectangle and one square you are going to sew on your pocket, as shown. Just sew around three edges of the rectangle leaving the top open, make sure your salvage edge is on the top, for your pocket opening.
 Next you're going to use your other square and sew down all of your tabs around the edges. I put four tabs on three of the four edges of the pillow. Point all of them inward, as shown, and sew them all down.
 Using the square that you sewed your pocket onto, you're going to center your handle and sew it down, underneath the pocket. Also, you will center and sew your velcro in place on the pocket, as shown.
 For your final step, you need to place both of your squares right sides together, pin in place, with the tabs facing inward and sew down around all of the edges leaving a three inch opening. Untuck your pillow with right sides out and stuff it with batting to desired consistency. Hand stitch or machine stitch your opening shut.
 You have now completed your travel pillow!
Duvet Cover:
This was my personal project for this week. My husband and I have been going back and forth trying to decide just what we want for our bed. He's really tall, so he wanted something long that would always cover his feet and I just wanted something really soft and pretty. So, we purchased a king size down-alternative comforter for our queen size bed and then I made a duvet cover. I picked out one-single fabric (I'm not much into quilting) and then I used a sheet for the bottom of the cover. I wanted to stay within a reasonable budget and this was the best way to do it and it turned out perfectly for our bed. To do this all you have to do is measure the comforter that you want for your bed and make the cover about two inches wider and longer. We love it! My next project is matching pillows or non-matching, I haven't decided yet!

No comments:
Post a Comment